Spiking Pliers
In searching for a suitable set of pliers for inserting spikes I first brought a pair of Burfitt spike insertion pliers and later a pair of Xuron pliers to replace them, but in the end i used a set of fine Tweezernose pliers from Xuron which are now my preferred tool for the job. From my experience i can say the follwing on the other pliers
Burfitt spike insertion pliers turned out to be unsuitable for the Small (1/4") spikes I was initially using and certainly couldn't be used with Micro (3/16") spikes. They are however suitable for use with Medium (3/8") and Large (1/2") spikes
Xuron spike insertion pliers are perfect for the Small (1/4") spikes and useable for the Medium (3/8") spikes but are not suitable for Micro (3/16") spikes.
Spikes
After
laying the first track with Small (1/4") spikes and having to cut the excess spike
head off I decided to try the Micro (3/16") spikes from micro
engineering. I knew i could get these from Walthers in the US but that but that
could take months and after searching for Australians supplier I ended up going
with Brunel hobbies who are a supplier for Walthers.
 |
| Comparison of the 1/4 spike i began with on the right and the 3/16 spike on the left that i have been using since |
Having never used or seen these small spikes i was unsure as to whether they
would really be strong enough to do the job or if i would even have the
patience to work with such small spikes, but I took a gamble and brought all 4
packets they had in stock totaling 4000 spikes.
The first think i noticed is that some of the bags contained a lot of failed pressings of the spikes which had no head or a deformed head. This aside the Micro Spikes had a more realistic appearance than the Small spikes and did not require any trimming. While i had chosen to pre-drill when using the Small spikes to make it easier, it wasn't necessary, while the Micro Spikes did require drilling when inserting through pine ties into mdf. I expect it would have been possible to insert micro spikes carefully into pine ties on a cork bed, but as you can see below even when pre-drilling i ended up with a fair number of bent spikes.
 |
| My preferred tools, cordless Dremel, fine needle nose pliers, rail cutters and micro engineering 3/16 spikes |
Drilling and Spiking
Initially I was using my corded Dremel to drill the holes but found balancing the weight of the Dremel whilst repeatedly drilling 0.4mm holes was annoying and ended up in several broken drills. Finally on the weekend i decided to make a change and buy a cordless Dremel which is much lighter and smaller and a pleasure to use and since switching to the cordless I have managed to avoid breaking any further drill bits. My experience so far has left me wondering why i never brought one sooner.
 |
| Predrilling holes with a 0.4mm drill bit |
After trying a range of pliers I have found the Xuron Tweezernose pliers to be my tool of choice. Inserting spikes is not without its mishaps and trying to find a 0.4mm hole can be challenging leading to many bent spikes.
 |
| Spike insertion with the fine needle nose pliers |
 |
| Failed spikes |
So far I have only been laying straight tracks which is kind of a relief and for the most part I have relied on eyeballing the alignment, but occasionally use a ruler to double check. Usually I start by establishing the correct position of both rails on the previously laid sleepers and then begin by spiking and aligning one rail first initially spiking every 20cm or so and then when the basic alignment is ok I have continued to spike several sections, correcting the alignment as i go and then infilling any gaps. With one side established I have moved to the second side and with the use of several track gauges I begin to spike the alignment of the second rail.
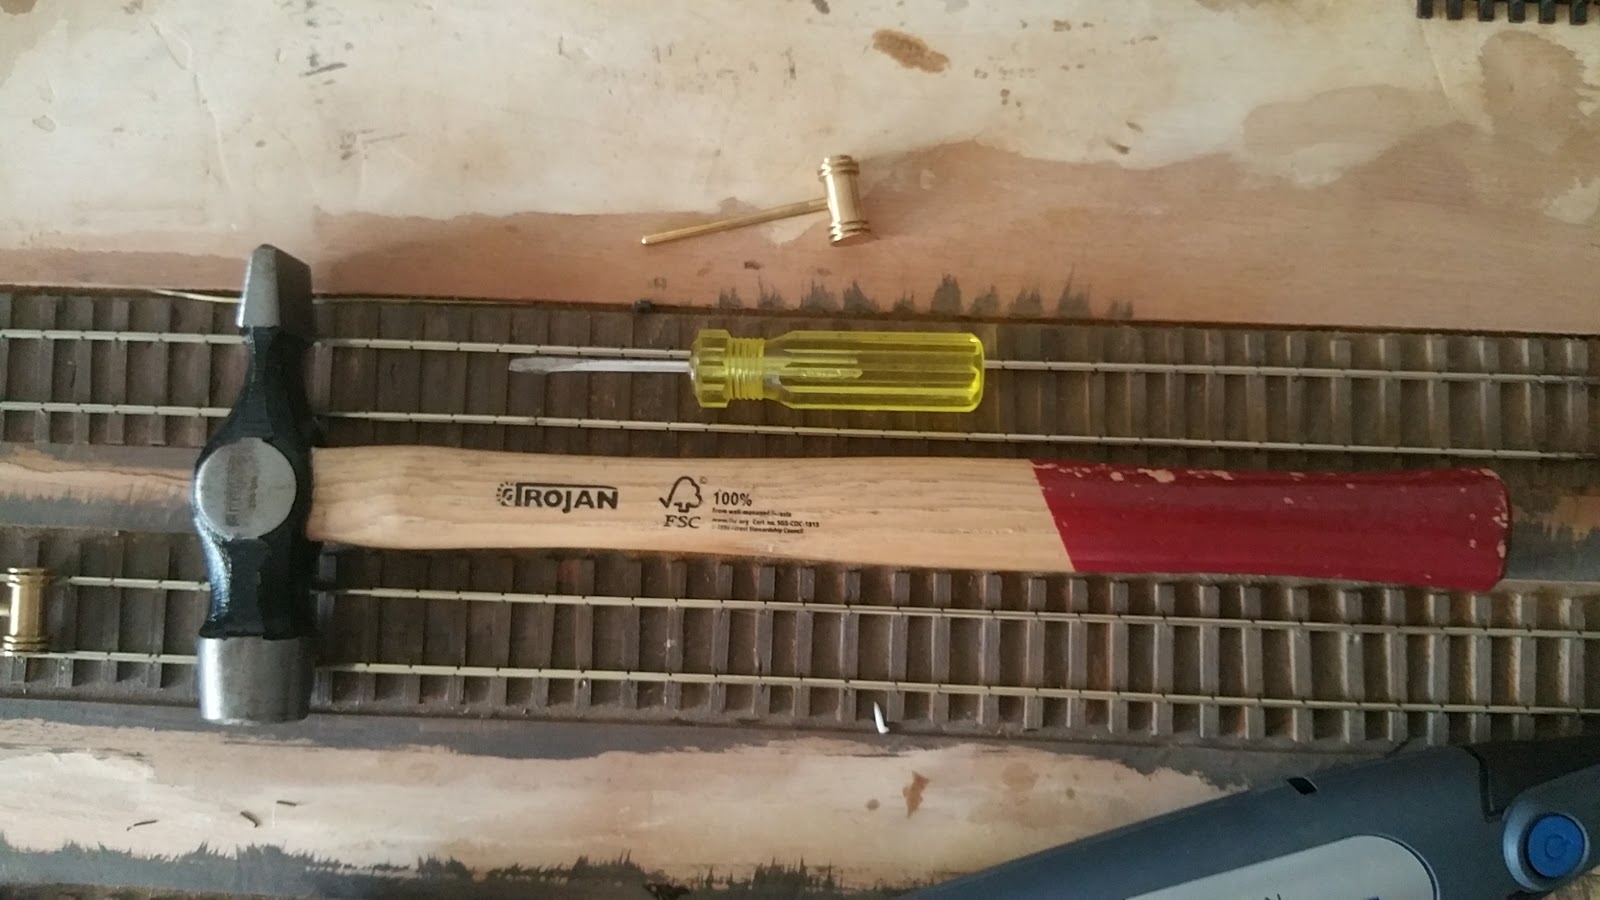
Sometimes alignment may need to be adjusted and if its major then the spikes have to come out, but if its a minor adjustment then i use a small screw driver at the base of the spike and a pin hammer to lightly tap to achieve the adjustment and close the spike heads back down on either side of the rail as necessary. Some times an additional spike may need to be added to secure the rail.
After eyeballing and running the track gauge along I also run a wagon along to check the gauge does not cause any issues.
 |
| Track gauge, pin hammer and screwdriver used for realignment |
 |
| One man rail gang hard at work |
Progress
So after many hours and over 2200 spikes I have completed the 4 yard tracks on the first section of the layout and I'm very pleased with the result.
 |
| Progress |
 |
| Last rails going down on the main line |
 |
| Finally all 4 tracks have been laid and spiked with only some additional ballasting remaining |
Next steps
- Complete the small section of the mill shunt below the mainline
- Complete below board wiring
- Form the platform and landscape south of the mainline
- Complete ballasting of the track and graveling of the yard surface
- Distress sleepers and weather track
- Complete the station building
- Build the goods shed
- Detail the yard
- Next section


